Wasps are beneficial insects, playing a crucial role in pest control by preying on flies, mosquitoes and other nuisance insects. However, their territorial nature and painful stings can make their presence near your home unwelcome.
If you’ve discovered a wasp nest on your property, it’s important to address the situation before an encounter becomes inevitable. This guide will equip you with the knowledge to identify wasp nests and remove them safely, prioritizing safe wasp pest control throughout the process.
Identifying Wasp Nests
The first step is to confirm you’re dealing with a wasp nest and not that of a different stinging insect, like bees or hornets. Here’s a breakdown of some common wasp nests and their characteristics:
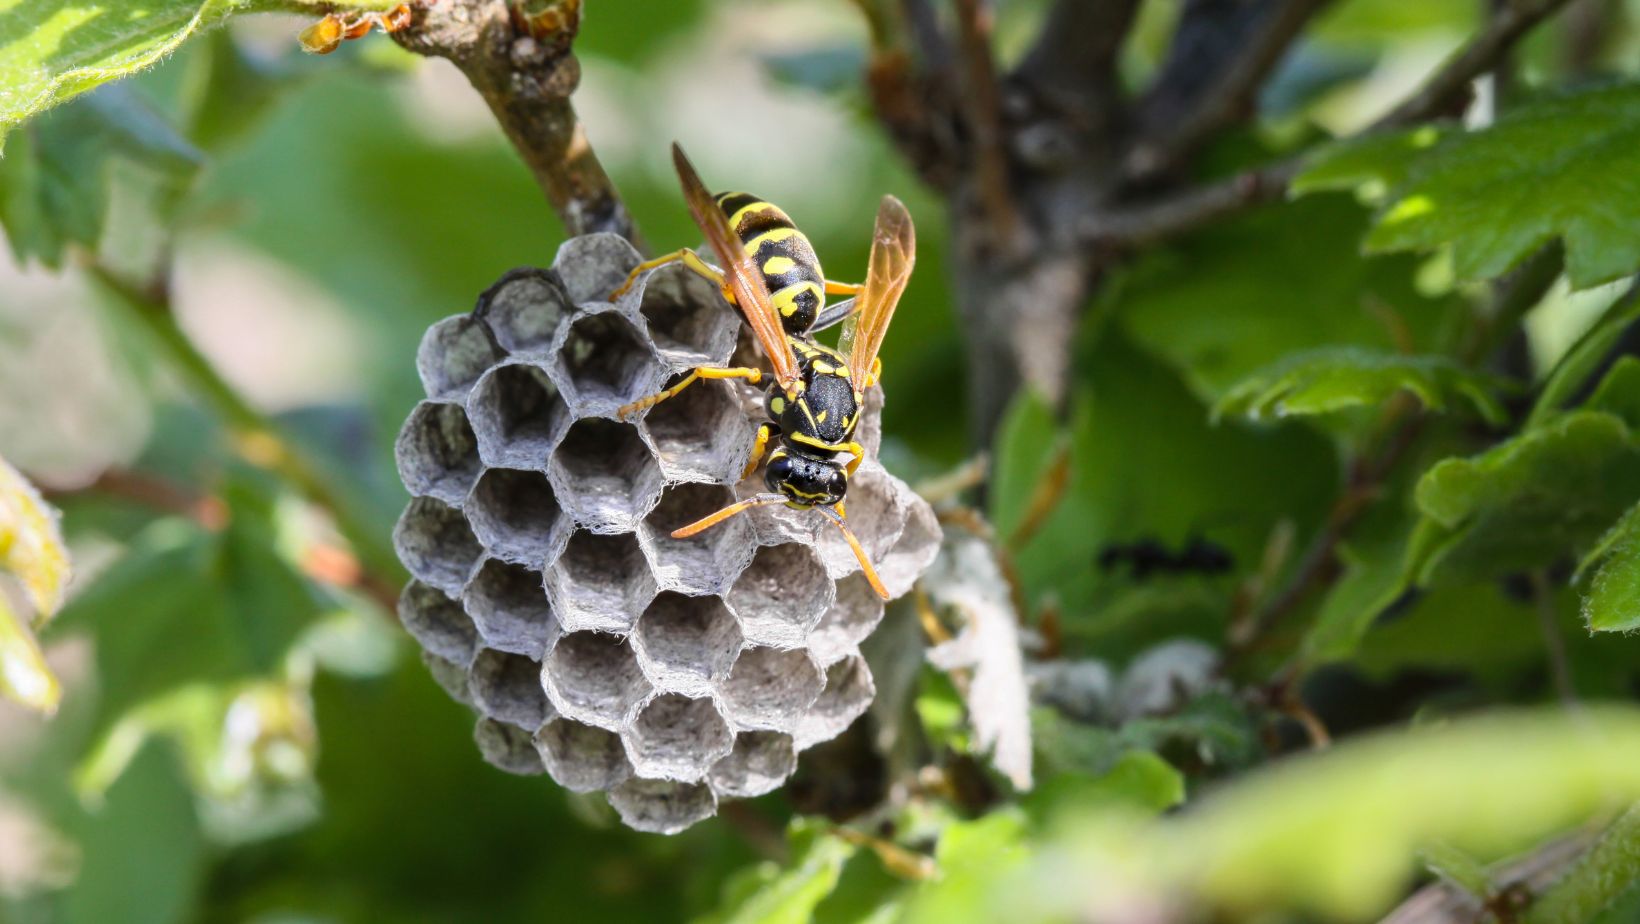
- Paper Wasps: These social wasps construct exposed, grey, papery nests with hexagonal cells. They’re typically found under eaves, porches, or on the sides of buildings.
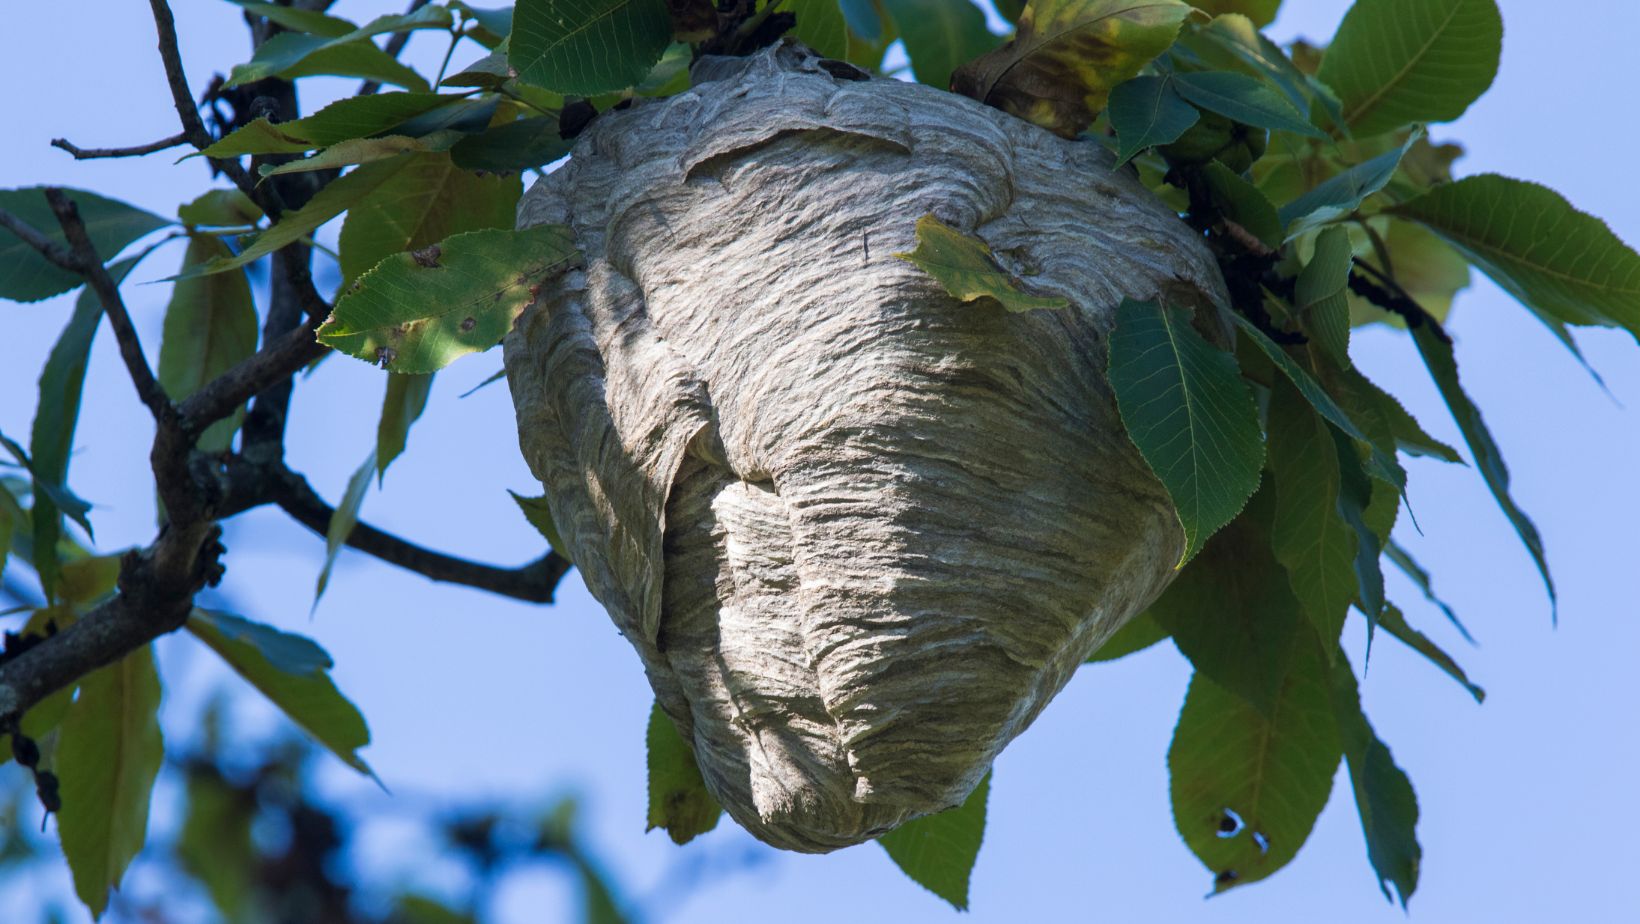
- Yellowjackets: Yellowjackets build underground nests in concealed locations like burrows, hollow trees, or even wall cavities within your home. Above-ground nests are also possible, often resembling upside-down footballs made of grey paper mache.
- Hornets: Bald-faced hornets construct large, grey, papery nests with a single opening at the bottom. They’re often attached to tree branches, eaves, or other elevated structures.

Once you’ve identified the type of wasp nest, consider its location and size. Large or difficult-to-reach nests, or those situated near high-traffic areas, are best left to professionals.
Safe Wasp Nest Removal: Preparing for Action
If you’ve determined the nest is a manageable size and location for DIY wasp removal, prioritize safety throughout the process. Here’s what you’ll need:
- Protective Clothing: Wear long sleeves, pants, gloves, and a close-fitting hat with a veil to shield your face. Consider taping your pant legs and sleeves to prevent wasps from crawling underneath.
- Wasp Spray: Choose an aerosol wasp and hornet killer with a long spray stream for a safe distance. Opt for products labeled for residual control, killing wasps that come into contact with the treated nest for an extended period.
- Tools: A sturdy broom or long-handled tool will be used to dislodge the nest, and a sealed plastic bag for disposal. A flashlight will be helpful for nighttime removal.
Timing is Key: The Nighttime Advantage
Wasps are less active during dusk and dawn. Choose a calm evening or early morning for your operation, minimizing the risk of encountering agitated wasps.
Removing the Nest: A Step-by-Step Guide
- Plan Your Escape Route: Ensure you have a clear path to retreat in case the wasps become agitated.
- Spray from a Distance: Stand at least 10-15 feet away and thoroughly saturate the nest opening with wasp spray according to the product instructions. Pay close attention to the underside of the nest for hidden entry points.
- Wait and Observe: Leave the area for at least a few hours, preferably overnight, to allow the spray to take effect.
- Inspecting the Nest: Don a fresh set of protective clothing and approach the nest cautiously during daylight. Look for signs of wasp activity – if they’re still buzzing around the entrance, repeat the spraying process.
- Removing the Nest: If the nest appears inactive, use a long stick or broom to dislodge it carefully. Quickly place the nest in the sealed plastic bag and tie it shut.
- Disposal: Dispose of the sealed bag in an outdoor trash can with a tight-fitting lid, preferably located far away from your house.
Natural Repellents and Preventative Measures
While effective, chemical wasp sprays aren’t for everyone. Here are some natural alternatives for deterring wasps and preventing future infestations:
- Soap Sprays: Mix equal parts dish soap with water in a spray bottle. Spray directly onto the nest entrance at dusk, coating the wasps and disrupting their activity.
- Strong-Scented Plants: Plant citronella, peppermint, or clove trees around your property. These natural repellents deter wasps with their strong aromas.
Preventative measures are key in avoiding future wasp problems. Regularly inspect your property for potential nesting sites, particularly under eaves, porches, or other sheltered areas. Seal any gaps or entry points around your home that wasps could exploit. By remaining vigilant and taking proactive steps, you can minimize the risk of wasp infestations and maintain a safe and enjoyable outdoor space.
Remember: If you’re uncomfortable with DIY wasp nest removal, especially for large or difficult-to-reach nests, or if you suspect an allergy to wasp stings, it’s always best to call a professional pest control service. They have the expertise, equipment, and safety gear necessary to handle the situation effectively.
Professional wasp removal companies can also identify the specific type of wasp and recommend additional treatment plans to prevent future infestations. Their services can provide peace of mind and ensure the complete eradication of the wasp colony, minimizing the risk of stings and ensuring the safety of you and your family.


More Stories
Remote Scribing: Enhancing Clinical Decision-Making
What Are The Different Types Of Lawn Sweepers And Which One Is Right For You
How Home Improvements Can Boost Comfort, Efficiency & Resale Value