

In the world of flooring, maintaining high-traffic areas involves a unique set of challenges. These spaces, be it commercial corridors, bustling entryways, or busy kitchens, endure endless footfalls daily. The wear and tear are inevitable, but with the right techniques, you can restore these floors to their original splendor. Sanding and refinishing are key processes that not only revitalize the surface but also extend the life of the flooring. Removing imperfections and applying protective finishes ensures durability and aesthetic appeal.
Why High-Traffic Areas Require Extra Care
High-traffic areas face constant stress, and this results in more pronounced wear patterns. Unlike less frequented spaces, these areas require extra attention to maintain their appearance and functionality. The continuous movement of people and furniture can lead to scratches, dents, and an overall dull appearance, demanding a more robust maintenance strategy.
The flooring in these zones often serves as a focal point, impacting the overall ambiance of a home or business. Maintaining the flooring’s integrity through hardwood floor sanding and refinishing not only preserves its aesthetic appeal but also contributes to the safety and hygiene of the space. A well-maintained floor minimizes the risk of accidents caused by slips or uneven surfaces.
Incorporating a regular maintenance schedule can mitigate premature damage. By understanding the specific needs of high-traffic areas, you can implement a proactive approach that preserves the beauty and functionality of your floors. Timber flooring from Vida Space is designed to perform exceptionally well in busy environments when properly cared for. This not only enhances the life of the flooring but also provides significant long-term cost savings.
Step 1: Inspecting Floors for Deep Scratches and Dents
Before embarking on the sanding and refinishing journey, thorough inspection is paramount. Begin by meticulously examining the flooring for deep scratches, dents, and other signs of wear. These imperfections can dictate the extent of sanding required and help in selecting appropriate refinishing materials.
To conduct a comprehensive assessment, it is advisable to use a flashlight or natural light to identify subtle flaws. Pay close attention to areas near entryways, around furniture, and in any spot where heavy foot traffic is evident. Documenting these imperfections will aid in strategizing an effective plan for sanding.
Consider creating a checklist for inspection:
- Surface Scratches: Identify areas with visible scuffs and marks.
- Dents: Look for depressions caused by dropped objects or heavy furniture.
- Water Damage: Check for discoloration or swelling.
- Finish Condition: Assess the current state of the floor’s finish.
Step 2: Cleaning and Preparing the Surface
Preparation is crucial for a successful sanding and refinishing project. Begin by thoroughly cleaning the floor to remove any dust, grime, or debris. This step ensures that the sanding equipment operates efficiently and that the new finish adheres correctly to the surface.
Start with a comprehensive sweep using a soft-bristle broom, followed by a vacuum with a soft floor attachment to capture fine particles. Consider using a damp mop with a gentle cleaning solution to eliminate any remaining residues. Ensure the floor is completely dry before proceeding to the next stage.
Proper preparation also involves removing any furniture or obstructions from the area. This not only facilitates an unobstructed workspace but also prevents accidental damage to furniture pieces. If needed, cover outlets and vents to prevent dust accumulation.
Step 3: Sanding for a Smooth, Even Finish
Sanding is a transformative process that requires precision and patience. The goal is to achieve a smooth, even surface that is ready for refinishing. Depending on the condition of your floor, you may need to start with a coarse grit to remove deep imperfections, gradually moving to finer grits for a polished finish.
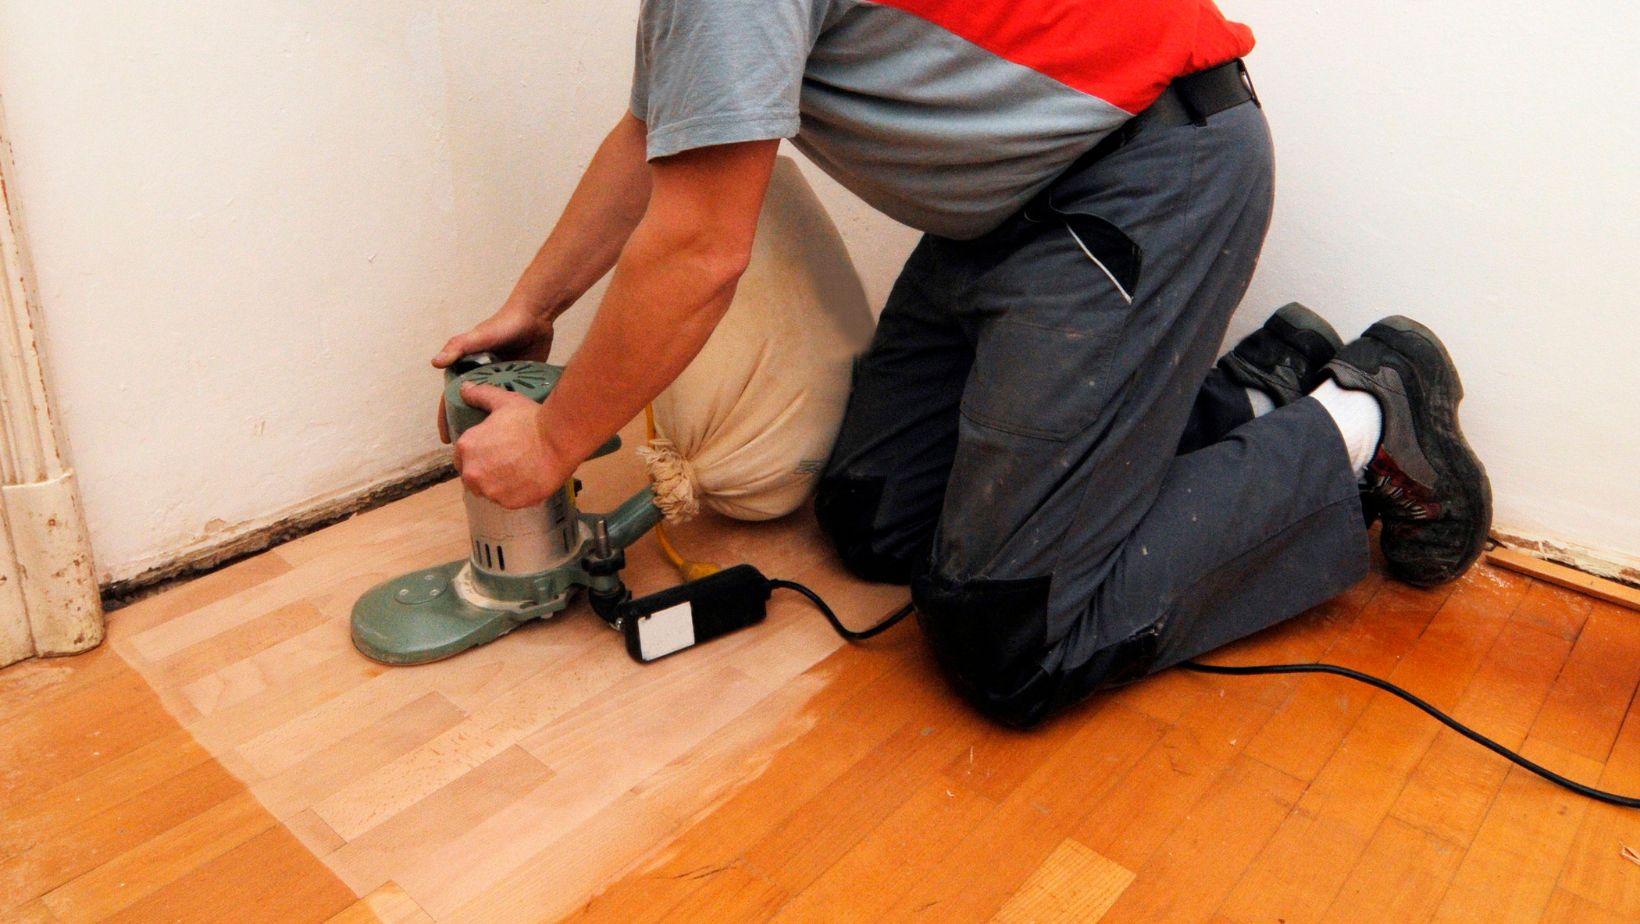
Here’s a step-by-step guide to sanding:
- Select the Right Equipment: Use a drum sander for large areas and an edge sander for corners and tight spaces.
- Begin with Coarse Grit: Start with a 36-grit sandpaper to remove old finish and deep scratches.
- Progress to Medium Grit: Move to a 60-grit for smoothing out scratches left by the coarse grit.
- Finish with Fine Grit: Use a 100-grit to achieve a smooth, even surface.
- Vacuum Thoroughly: After sanding, vacuum the floor to remove all dust particles.
Sanding not only restores the floor’s appearance but also prepares it for the application of new finishes, ensuring longevity and enhanced visual appeal.
Step 4: Applying Durable Finishes for Longevity
Once the sanding is complete, it’s time to apply a finish that will protect the floor and enhance its beauty. After sanding, choose a finish that offers both protection and beauty. Polyurethane varnishes are known for their hardness and durability, forming a tough and waterproof film—much more resilient than traditional oil or shellac finishes.
Consider the following when choosing a finish:
- Water-Based Polyurethane: Dries quickly, has minimal odor, and provides a clear finish.
- Oil-Based Polyurethane: Offers a rich, warm glow and enhanced durability.
- Penetrating Oils: Soak into the wood, offering a natural finish with good protection.
Apply the finish using a high-quality brush or applicator, following the grain of the wood for an even coat. Allow adequate drying time between coats, typically requiring two to three applications for optimal protection.
Step 5: Maintaining Floors to Keep Them Looking New
Maintenance is the key to preserving the beauty and integrity of refinished floors. Implementing a regular care routine can significantly extend the life of your flooring, ensuring it remains a stunning feature in your space.
Here are some maintenance tips:
- Cleaning Routine: Use a damp mop regularly to remove dust and dirt. Avoid harsh chemicals that can damage the finish.
- Furniture Pads: Attach felt pads to the legs of furniture to prevent scratches.
- Rugs and Mats: Place rugs in high-traffic areas to reduce wear and tear.
- Humidity Control: Maintain consistent indoor humidity to prevent wood from expanding or contracting.
Summary
Sanding and refinishing high-traffic areas is an investment in the longevity and beauty of your floors. By following a structured approach—inspecting, preparing, sanding, finishing, and maintaining—you can achieve professional results that stand the test of time. The process not only restores the aesthetic appeal of your flooring but also enhances its durability, making it a worthwhile endeavor. With the right tools, techniques, and care, your high-traffic areas can become a stunning showcase of your attention to detail and commitment to quality.
More Stories
How to Know When It’s Time to Replace Your HVAC System?
How to Fix Defrost Cycle Delays on Air-Source Heat Pumps in 2026
Practical Decluttering Strategies for Utah Homeowners